Blank
Start with a completely blank Klaro project and configure everything yourself. This template is ideal if you already know Klaro and have a fairly precise idea of your workflow.
Step 1: Define the nature of the processes you want to track
Klaro is a lightweight & agile process management tool. It helps you follow something that occurs in the real world. What is that something that you want to capture with Klaro cards? You can track almost any process you like.
For example, each card will be a:
- Task
- Issue
- Idea
- Lead
- …
Once found,
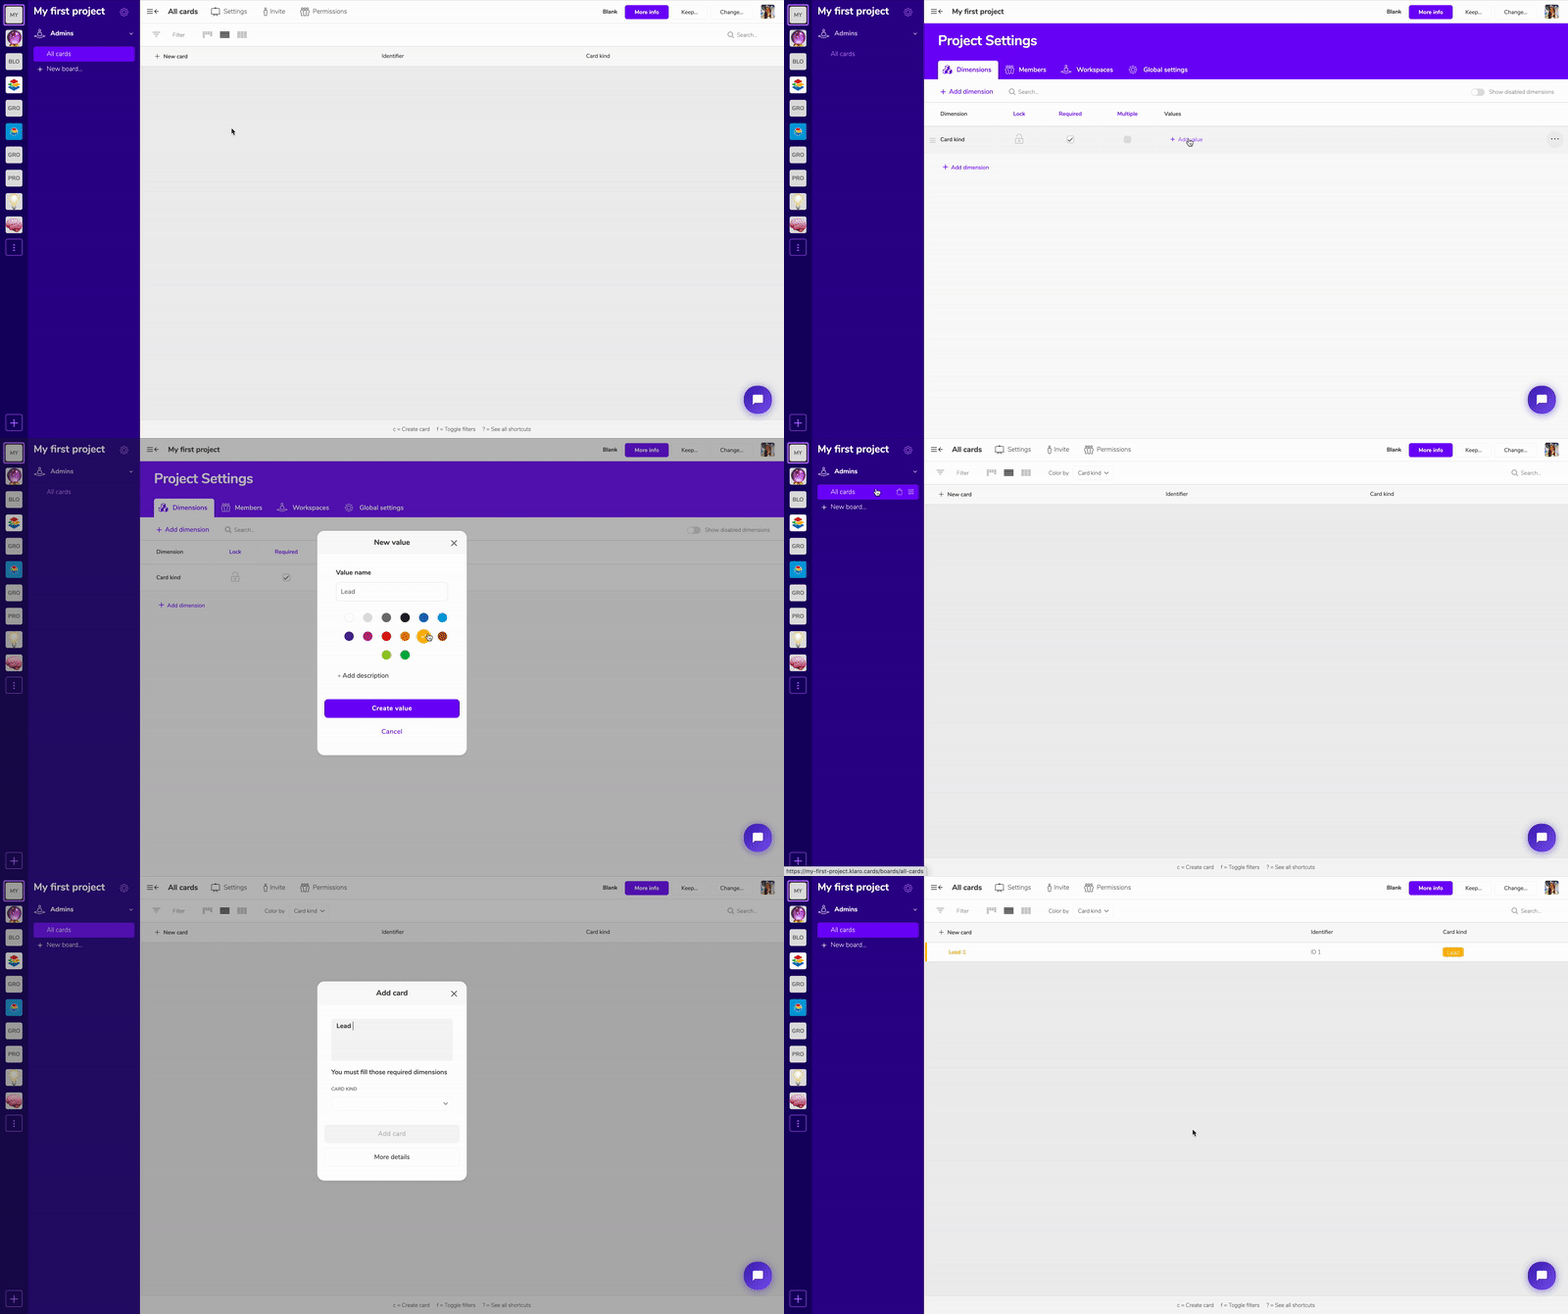
- Go to
Project settingsand find the Card kind special dimension. Add a first value corresponding to the nature of cards you just listed above. - Go back to the All cards board and create a few cards.
In our example we are tracking Leads.

Step 2: What are the main steps of the process?
Each card captures something with a status evoloving over time (i.e. a process). Therefore at every moment each card must be in a given process state.
What are these different states? Examples include:
- Task: Todo, Ongoing, Done, Abandoned
- Issue: Detected, Fixing, Review, Closed
- Idea: Concept, Defined, Prototype, Test
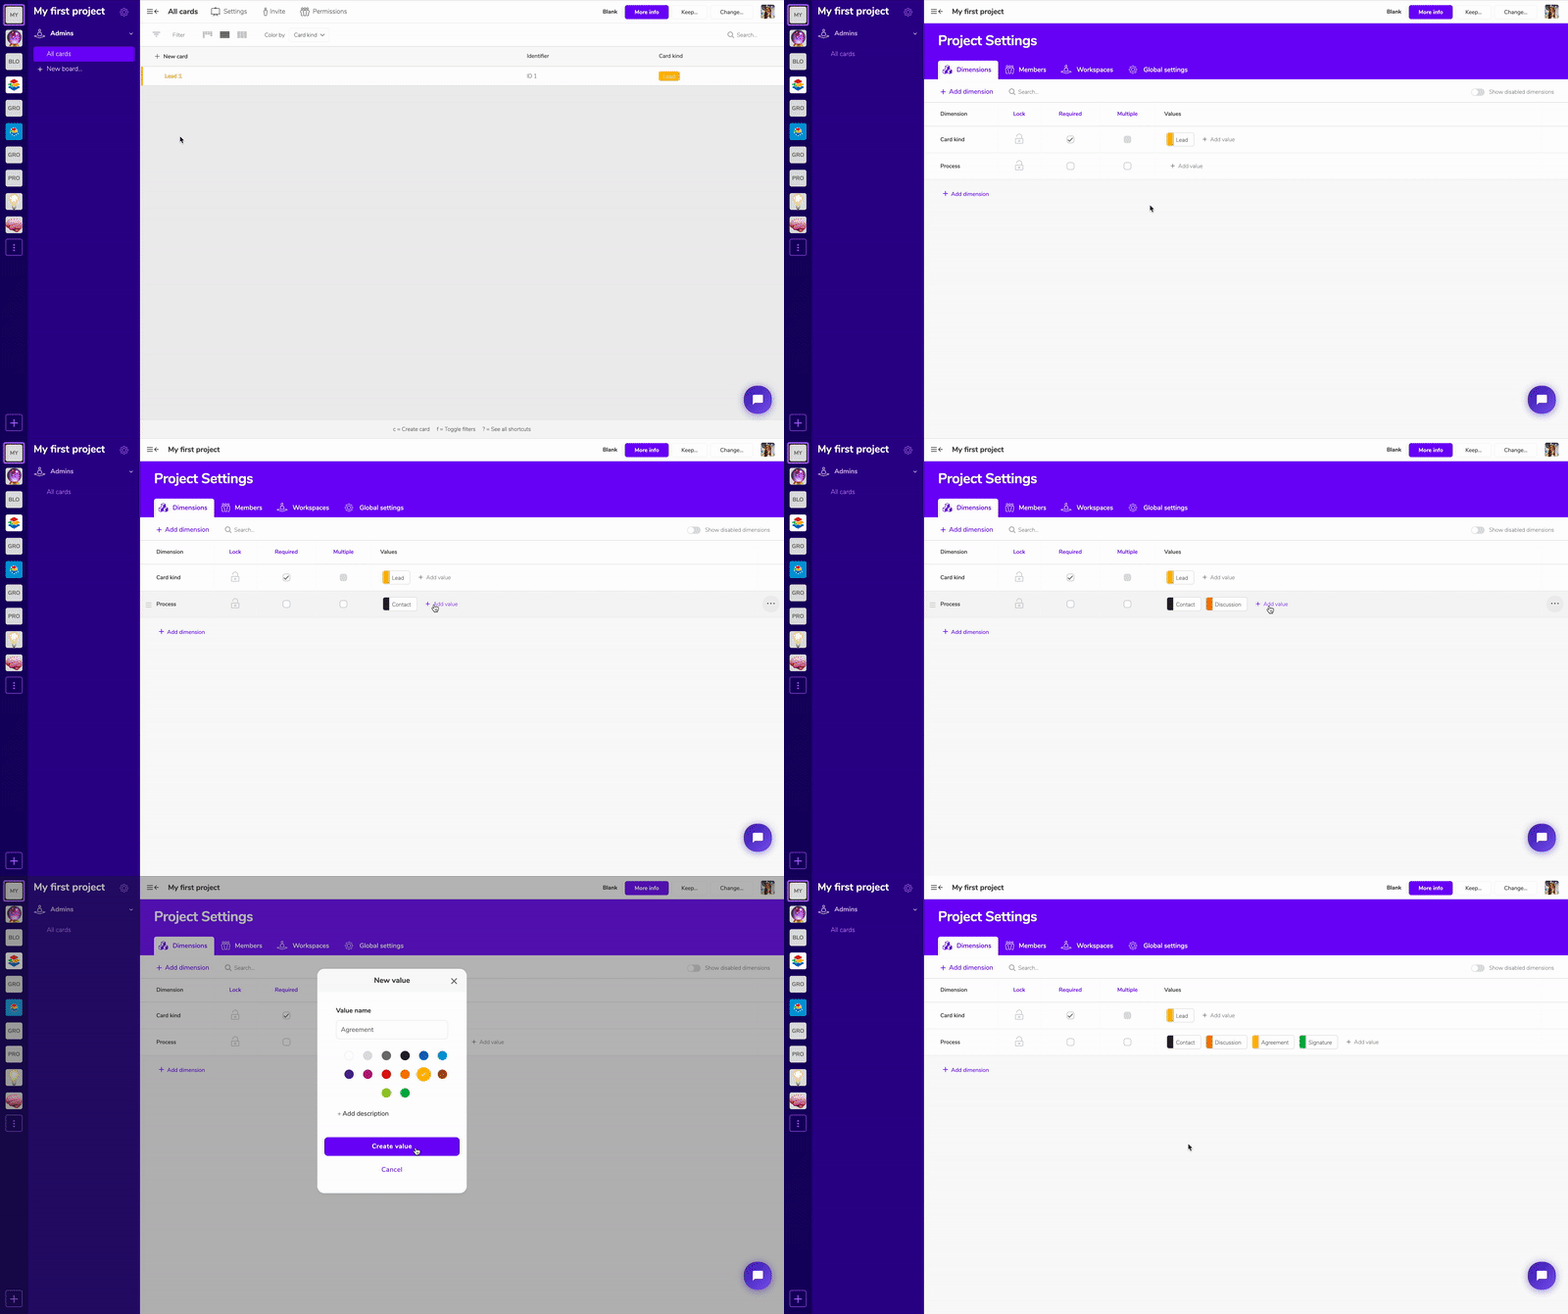
- Lead: Contact, Discussion, Agreement, Signature
Once defined: Install the Progress special dimension and create the values that correspond to your process states.

Step 3: Create a new vision of your project

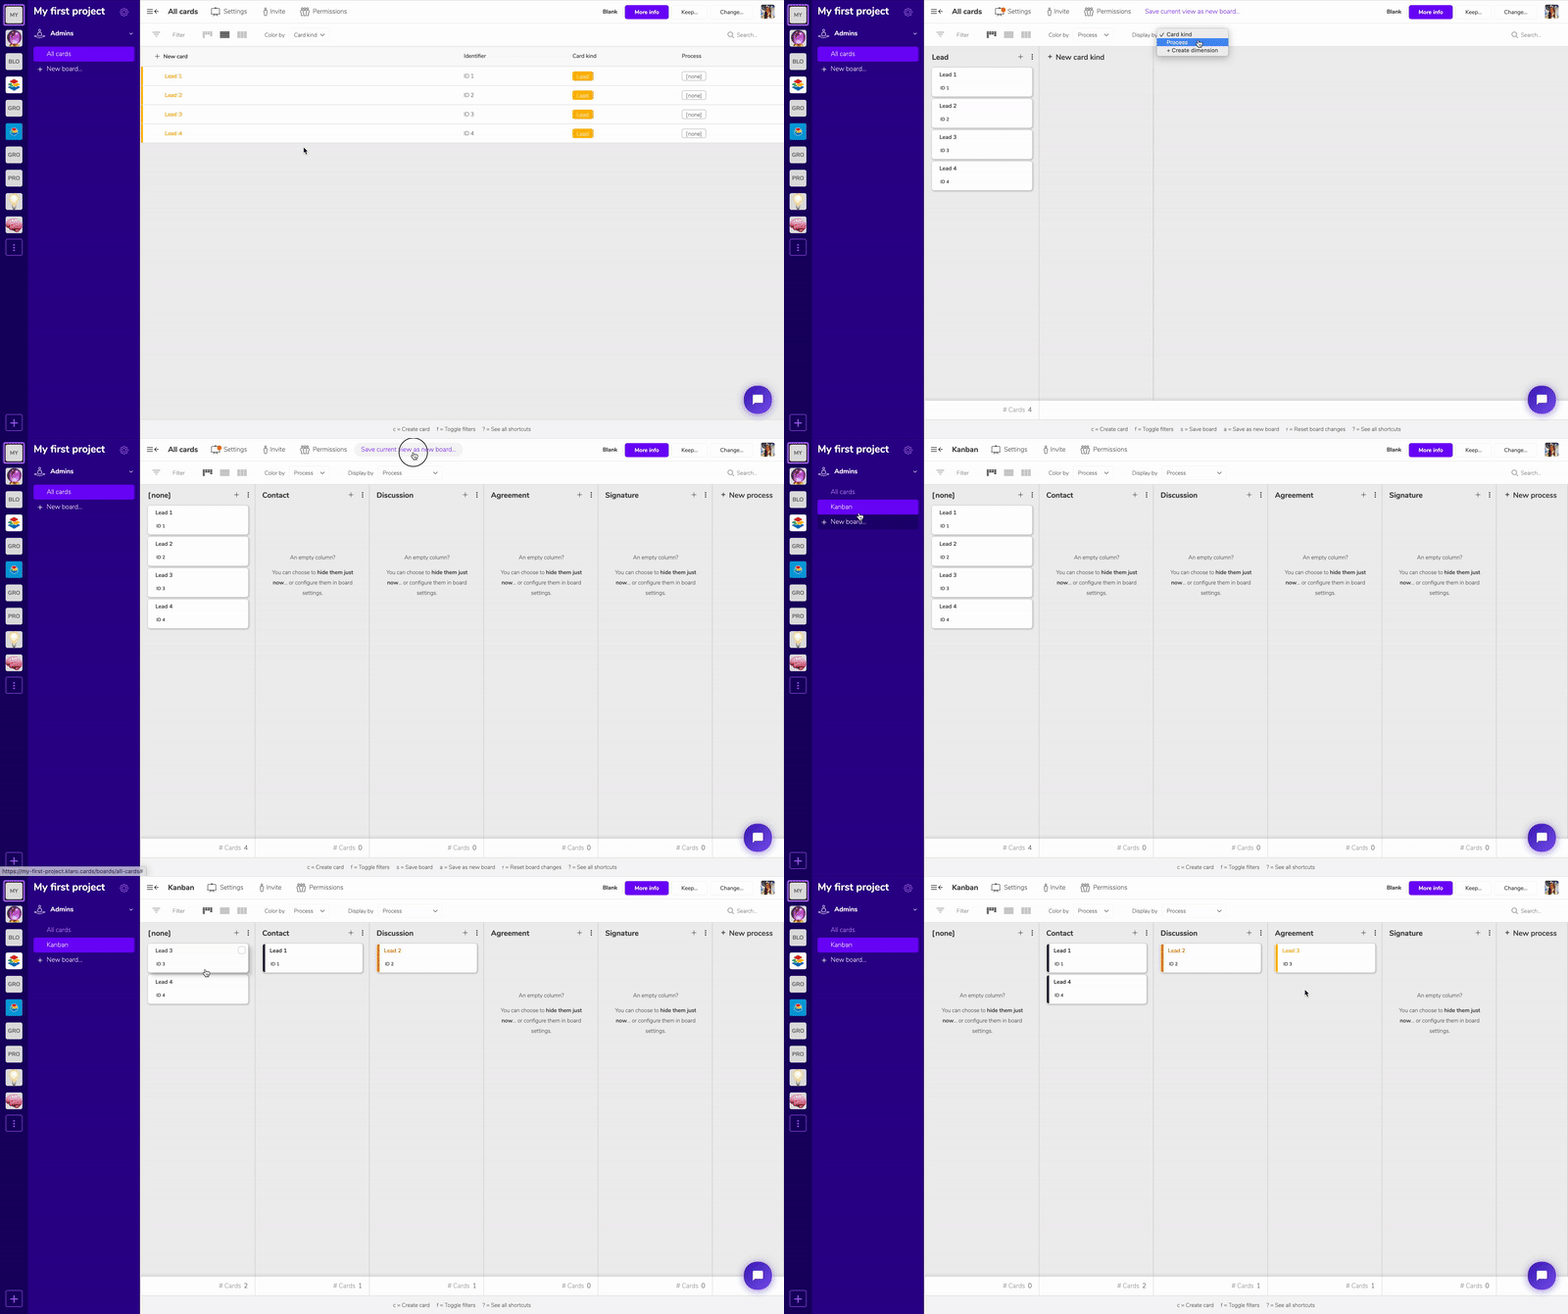
- Go back to the All cards board. Switch to the Kanban view (columns) and choose to display by the Progress dimension. Save the board under a new name, e.g. "Kanban".
- Congratulations - you have just created your first board. Move the cards from left to right to capture progress.
Step 4: Additional information to capture on cards?
Do you need some extra information on your cards? Check the special dimensions available and install what you need, or simply create your own list:
- Assignee (team member responsible for working on / moving a particular card)
- Due date (deadline for the corresponding card to reach the Done column or equivalent)
- Created / Updated at (allows you to filter)
- Priority (Must have, Should have, Nice to have)
- Anything you want! In our example, we decided to add a
Countrydimension
Once you have added some of these extra dimensions:
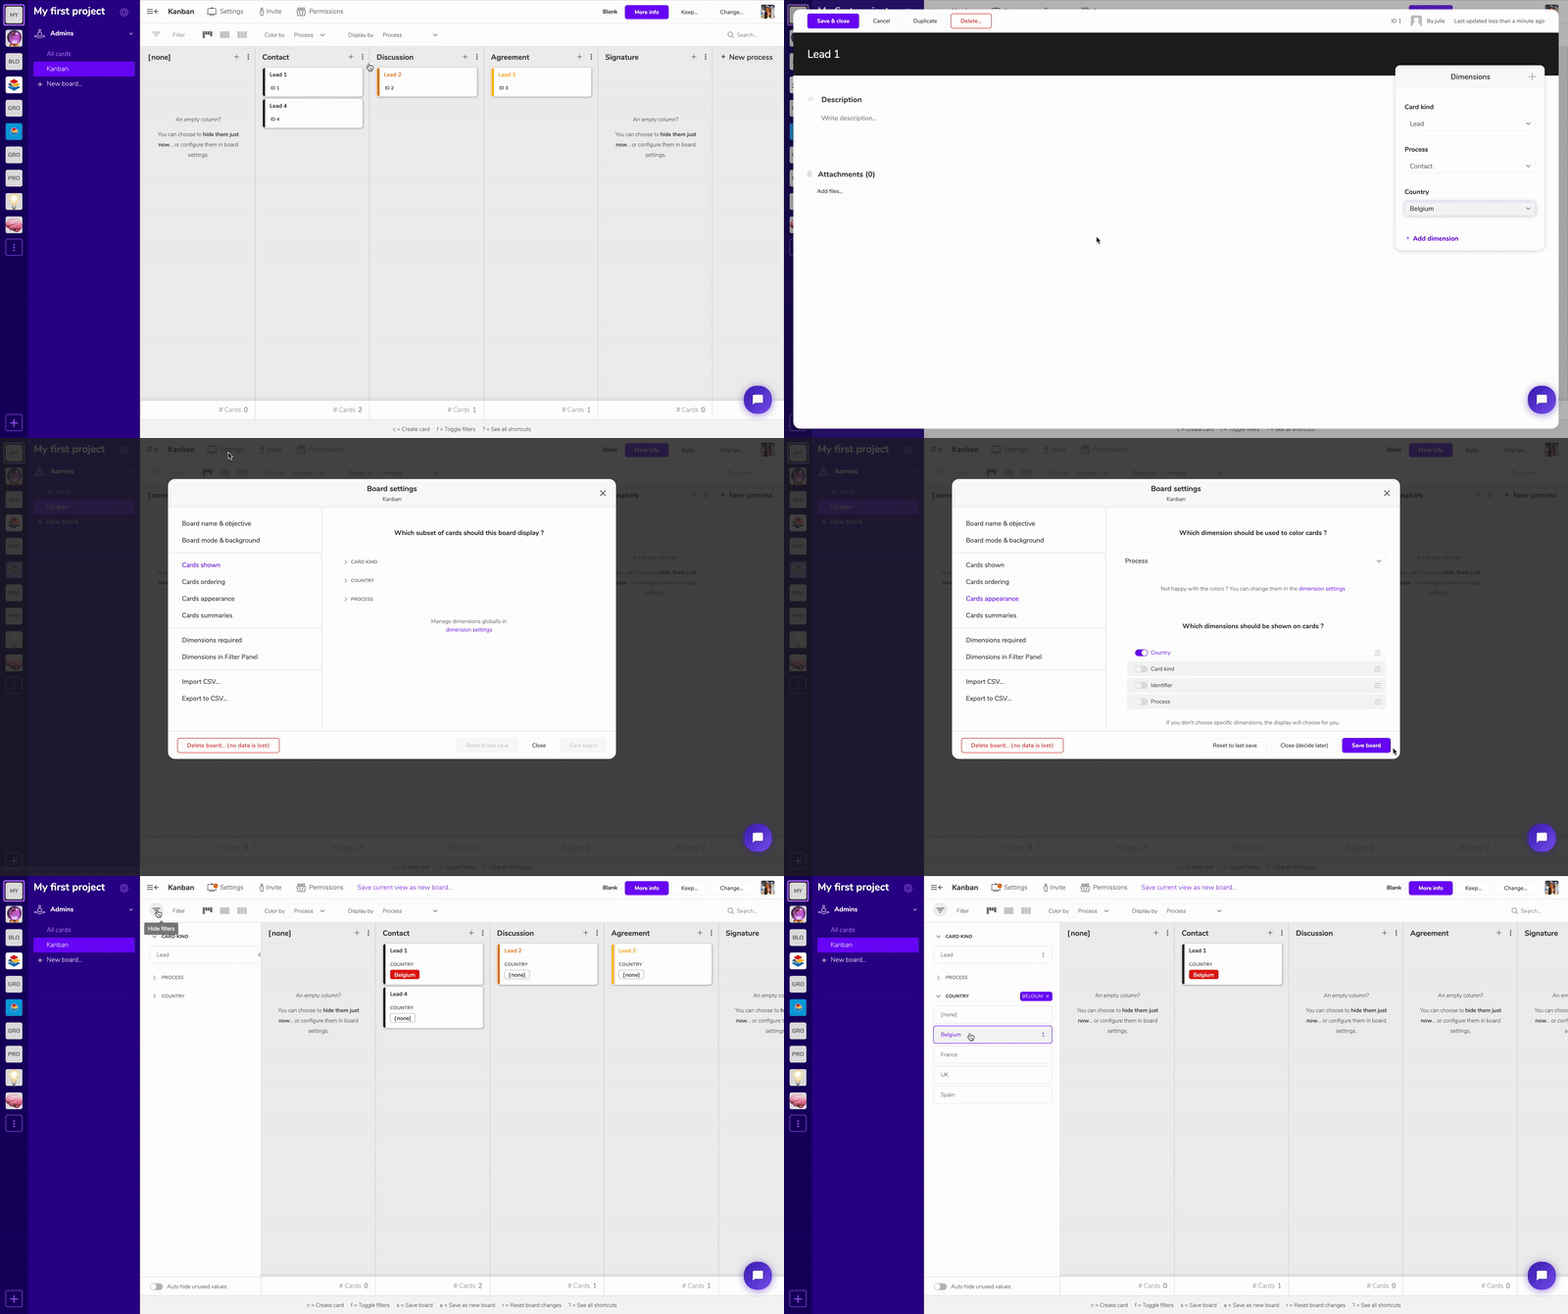
- Open an existing card - you can track additional information on the right.
- Get back to your Kanban board and go to Cards appearance in the Board settings - you can choose which dimensions to show on cards.
- Open the Filters at the left of the screen - you can show or hide relevant cards in each board.

Step 5: Get to know Klaro - it’s not rocket science
Klaro is fundamentally flexible from an information point of view: no dimension is more "special" that another. Almost everything you can do with one dimension can be done with others:
- Open Filters. You can filter every dimension. Filters are saved in the board definition. Each board can just show the cards that make sense in its particular context.
- Open Cards appearance. You can show every dimension that you want on cards, and make different choices for each board.
- Open the Display by widget. You can make a Kanban from any dimension you want, and drag & drop cards around easily.
- Open Cards ordering in board settings. Any dimension can be used to sort cards top-down in boards. Think about it: getting priorities right often means getting what’s important at the top of the board. You know what’s important; capture it with your own dimensions.
Need help on this (or any other) template? Contact us at info@klaro.cards or using the Chatbot located at the bottom right. We will be happy to help you.
